
I have recently broken the screen in my beloved Lenovo X1 Carbon (second generation). It happened to me by accidentally stepping on it, when the laptop was laying on the floor. And yes, I totally agree, that putting laptop on the floor is not a good idea, especially right next to your bed, but yea, some things you just need to learn the hard way.
Whenever I opened the laptop after stepping on it, the screen was not in its perfect condition any more…

I tried to use my laptop for a while, despite the broken screen, then I closed the lid and whenever I opened it again, the screen remained black.
I started googling for IT services, that could fix my laptop, but this solution had too many disadvantages: it was expensive, the estimated time of fixing process was at least few working days and somebody had to deliver the laptop to the service (and at that point of time I was stuck at home with broken ankle).
I tried to look for other ideas, and I thought that I can try to replace the screen by myself. I mean – what could be the worst thing that could happen – in case I fail during the process of disassembling or assembling it, I can always deliver it to the service, and they will finish the job for me. I decided to take the risk and started searching for any tips regarding replacing the screen in Lenovo X1 Carbon, and since I did not find any tutorial for this exact model with this exact generation, I decided to share my tips here.
1. Disconnect the battery
The battery in Lenovo X1 Carbon is hidden inside the laptop, thus you have to open the laptop in order to disconnect the battery. Unscrew all the screws in the bottom of your laptop and open the lid. Locate the battery connector, which is placed in the middle, and disconnect the battery.

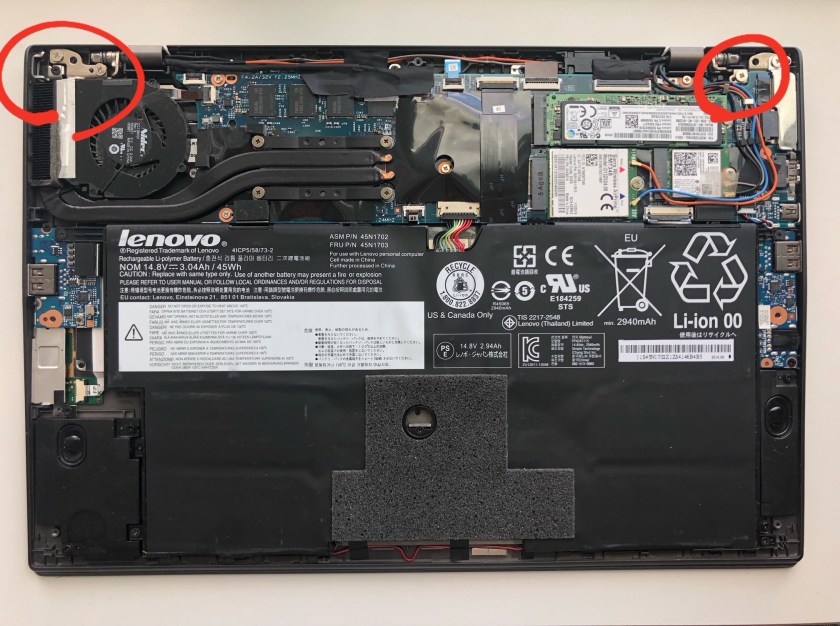
2. Disconnect all cables that go out of the screen
In order to completely detach the screen part of a laptop, the screen has to be disconnected from all the components that are placed on a motherboard.
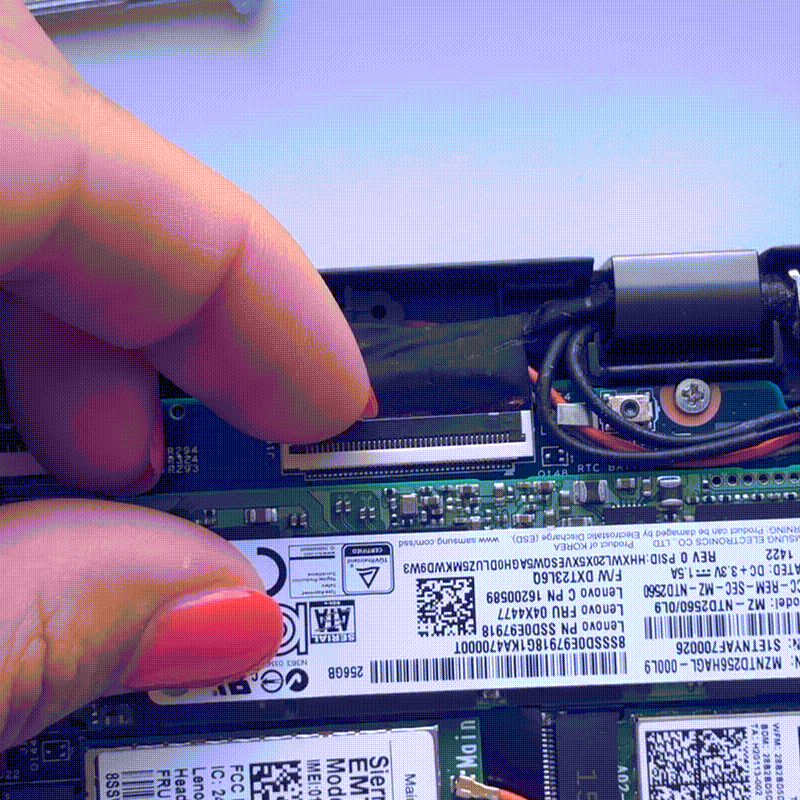
2.1 Long screen connector to the right
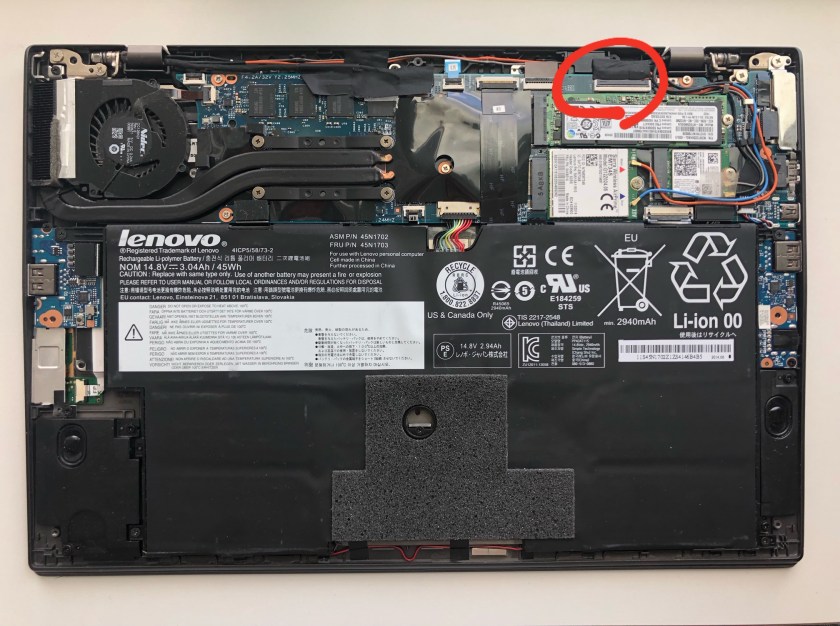
You can disconnect it by simply lifting the plastic part and pulling the cable out.
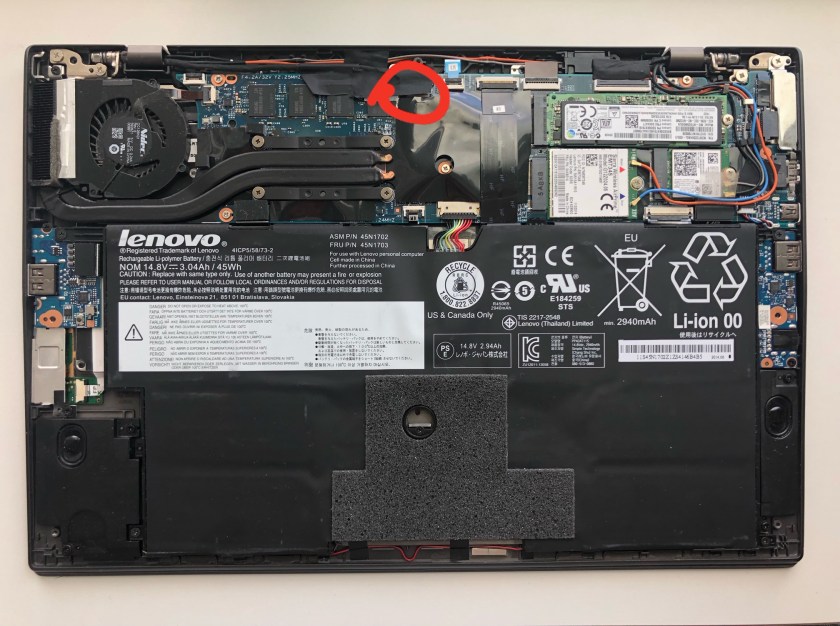
2.2 Short screen connector to the left (a little hidden in the picture)
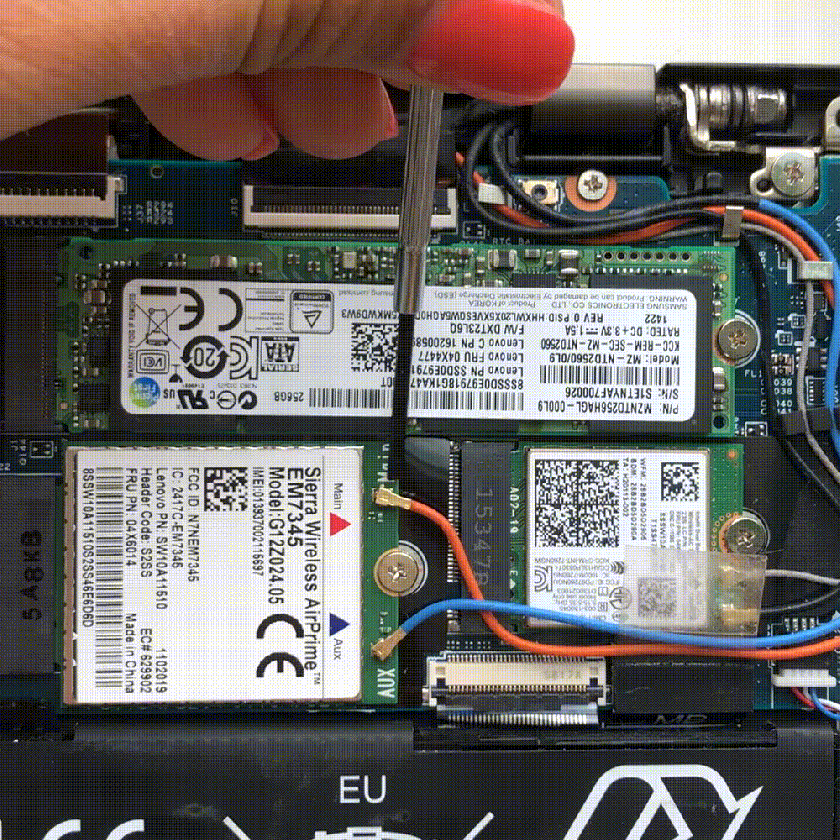
2.3 Other long cables that go out from the screen
The remaining cables are connecting the antennas to 4G and Intel dual band wireless modules. To completely disconnect the cables, I had to unscrew the SIM-card slot.

3. Unscrew screen hinges
Now, the easy part, just unscrew the screen hinges that are placed in the corners.
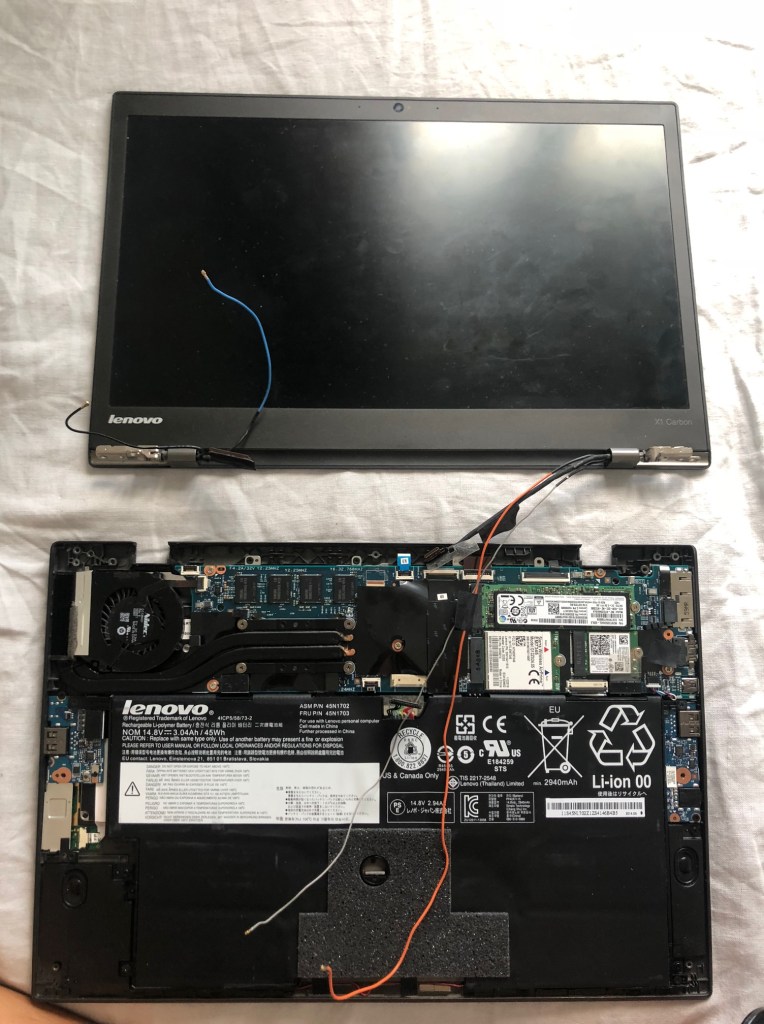
4. Detach the screen
Now the screen should be free to detach from the main part.
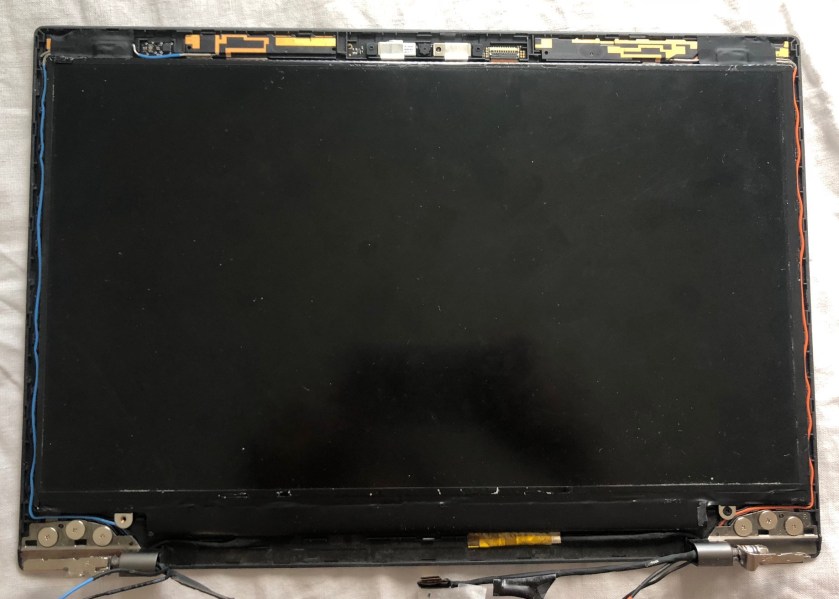
5. Disassemble the screen part
Open the screen part to get to the actual screen by detaching the front plastic cover.
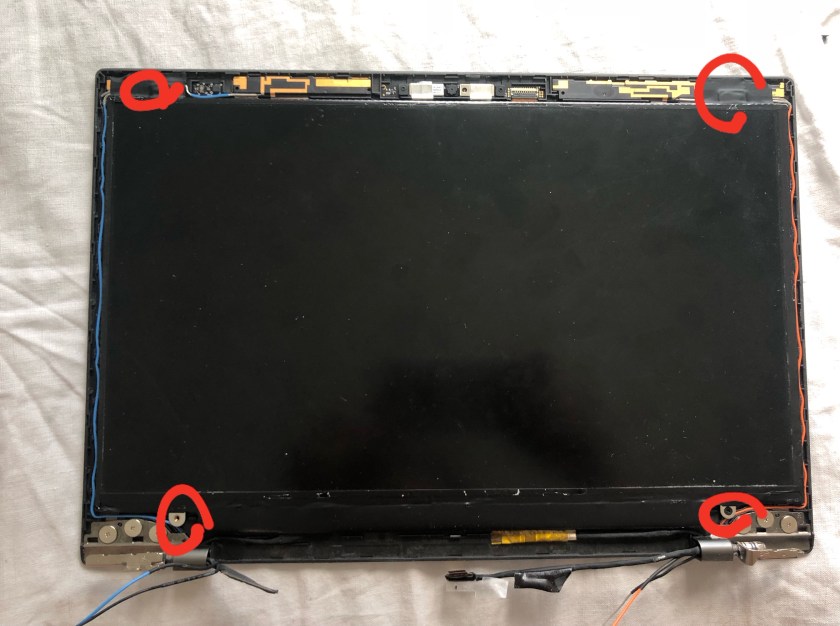
Unscrew the four screws that are holding the screen and detach the cable that is connected to it. Now the screen should be detached completely from the cover.
6. Find the replacement screen online
Flip the screen and find the screen model number in the labels. In my case the model number LP140QH1 (SP)(B1) was located in the label in the bottom right corner. Use the screen model number to order the replacement screen online. I have ended up ordering the exact screen LP140QH1 (SP)(B1), but I have received a (SP)(A1), which had the cable input moved to the left by around 1cm. I was afraid to mount the screen in my laptop in the beginning, but in the end it did not give any problems.

7. Mount the new screen and assemble the laptop
Now the fun part starts – whenever you get your new screen delivered, just follow the 1-5 steps in reverse order (and instead of detaching, just attach the specific things) and here you go! Turn on your laptop and enjoy your brand new screen!
Don’t be afraid to take action
The replacement of screen in my laptop led me to the conclusion, that sometimes you just need a little bit of motivation (and spare time) to learn how to fix simple things and just do it. Don’t be afraid to take action and learn every day!
And that feeling, when you turn on your laptop for the first time after it was broken and see that it works is just amazing!
